Connect SDK
Rollee Connect SDK is a plugin for integrating Rollee Connect process into Web or Mobile Applications.
Get Started
To start using Rollee Connect SDK you should already be provided with a JWT Token. In the following steps, we are guiding you to create an example project, integrate SDK, customize and use it.
Supported Languages
We are supporting:
Instructions to integrate Connect with your Backend Service
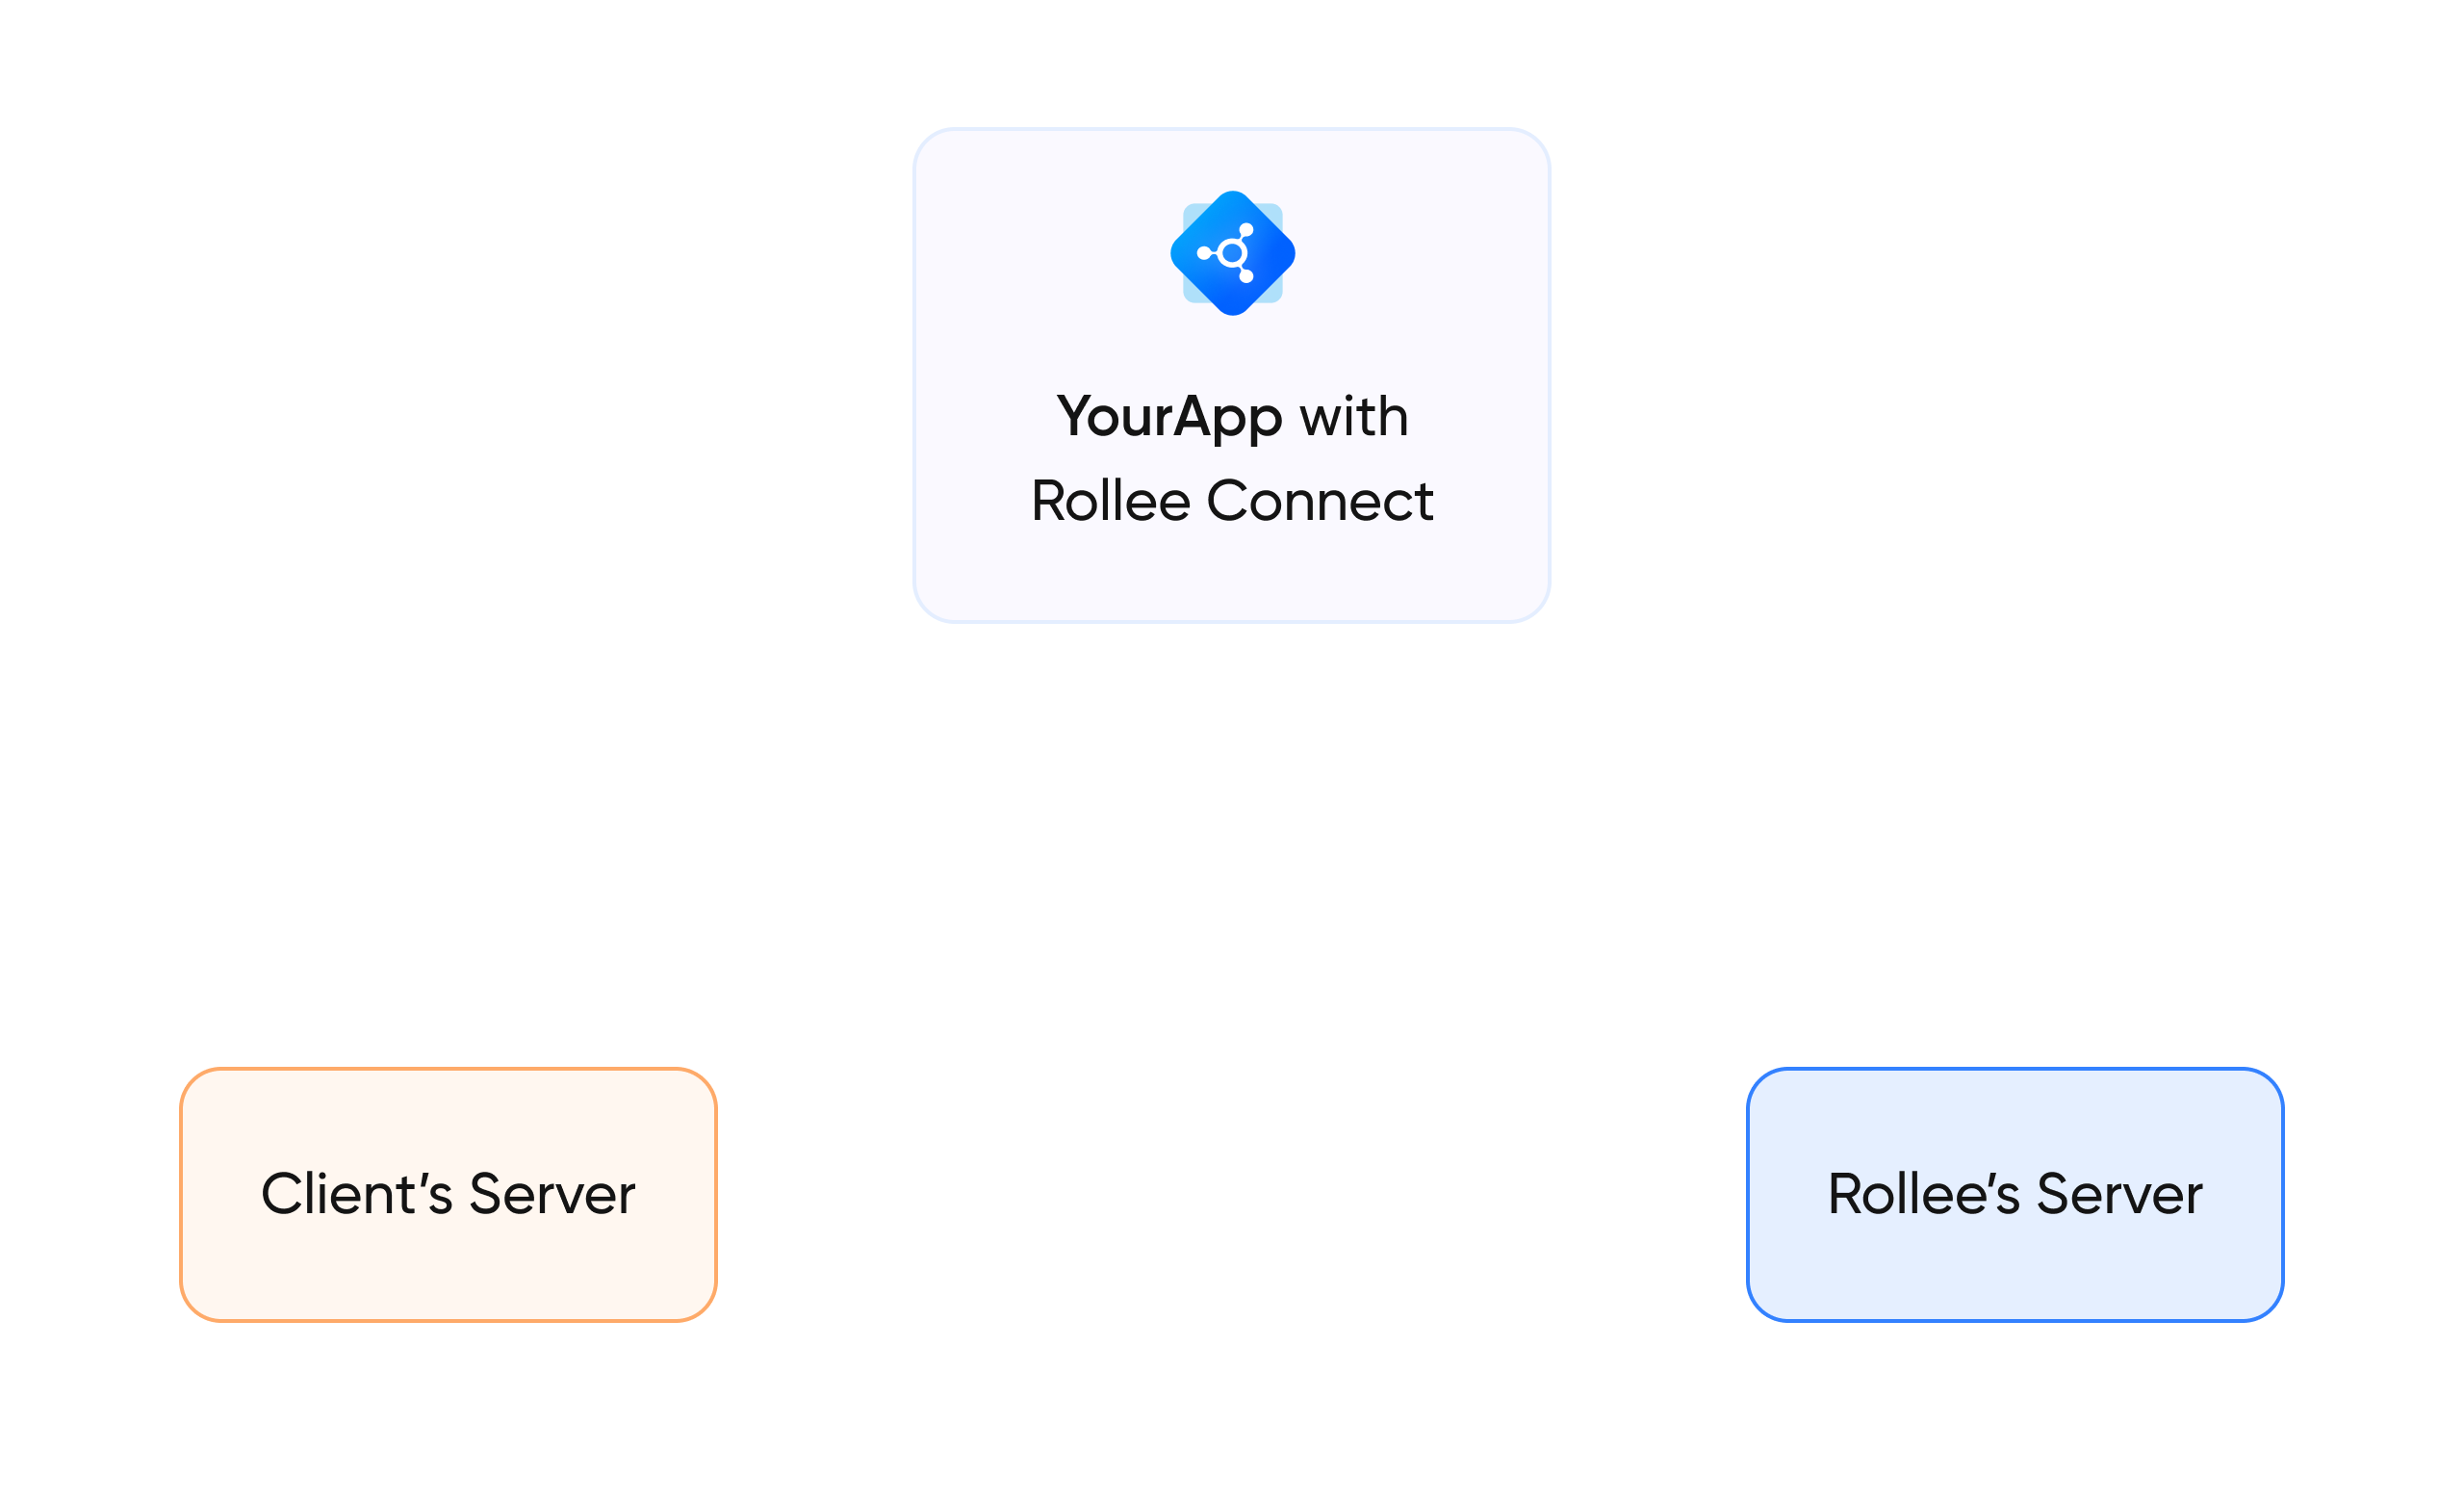
In order to use Rollee Connect you must integrate it in your system in a way that it receives data with the right authentication. For that to happen, there is a flow of information that must be implemented. This flow includes 3 components:
- your Instance of Rollee Connect, ( ex.: the mobile app )
- Rollee's own Backend Server ( owned by Rollee )
- your Server ( acting as a middleman between Rollee's Server and your Rollee Connect Instance )
To abbreviate, we shall call the components Client's App with Connect, Rollee's Server and Client's Server.
The next picture illustrates the components:
Step 1 - Request a New User and a New Session
First of all, whenever you wish to use Rollee Connect, you must create a User. A User is an entity that connects accounts. That User is only allowed to connect accounts if there is a valid Session associated with it.
If you want to create a User, you can do it with the following request:
curl -X POST -H 'Authorization: Bearer <YOUR_TOKEN>' https://api.getrollee.com/api/v0.4/users/
curl -X POST -H 'Authorization: Bearer <YOUR_TOKEN>' https://api.sand.getrollee.com/api/v0.4/users/
For you, the Client Server, to successfully connect an account to one of our datasources, you must first create a new Session. This Session will be associated with the account that is connected afterwards. To achieve that, you must make a request to Rollee’s Server asking for a new Session (passing the Auth Token on that request) and the Rollee Server will return a URL for Rollee Connect with a New Session Token.
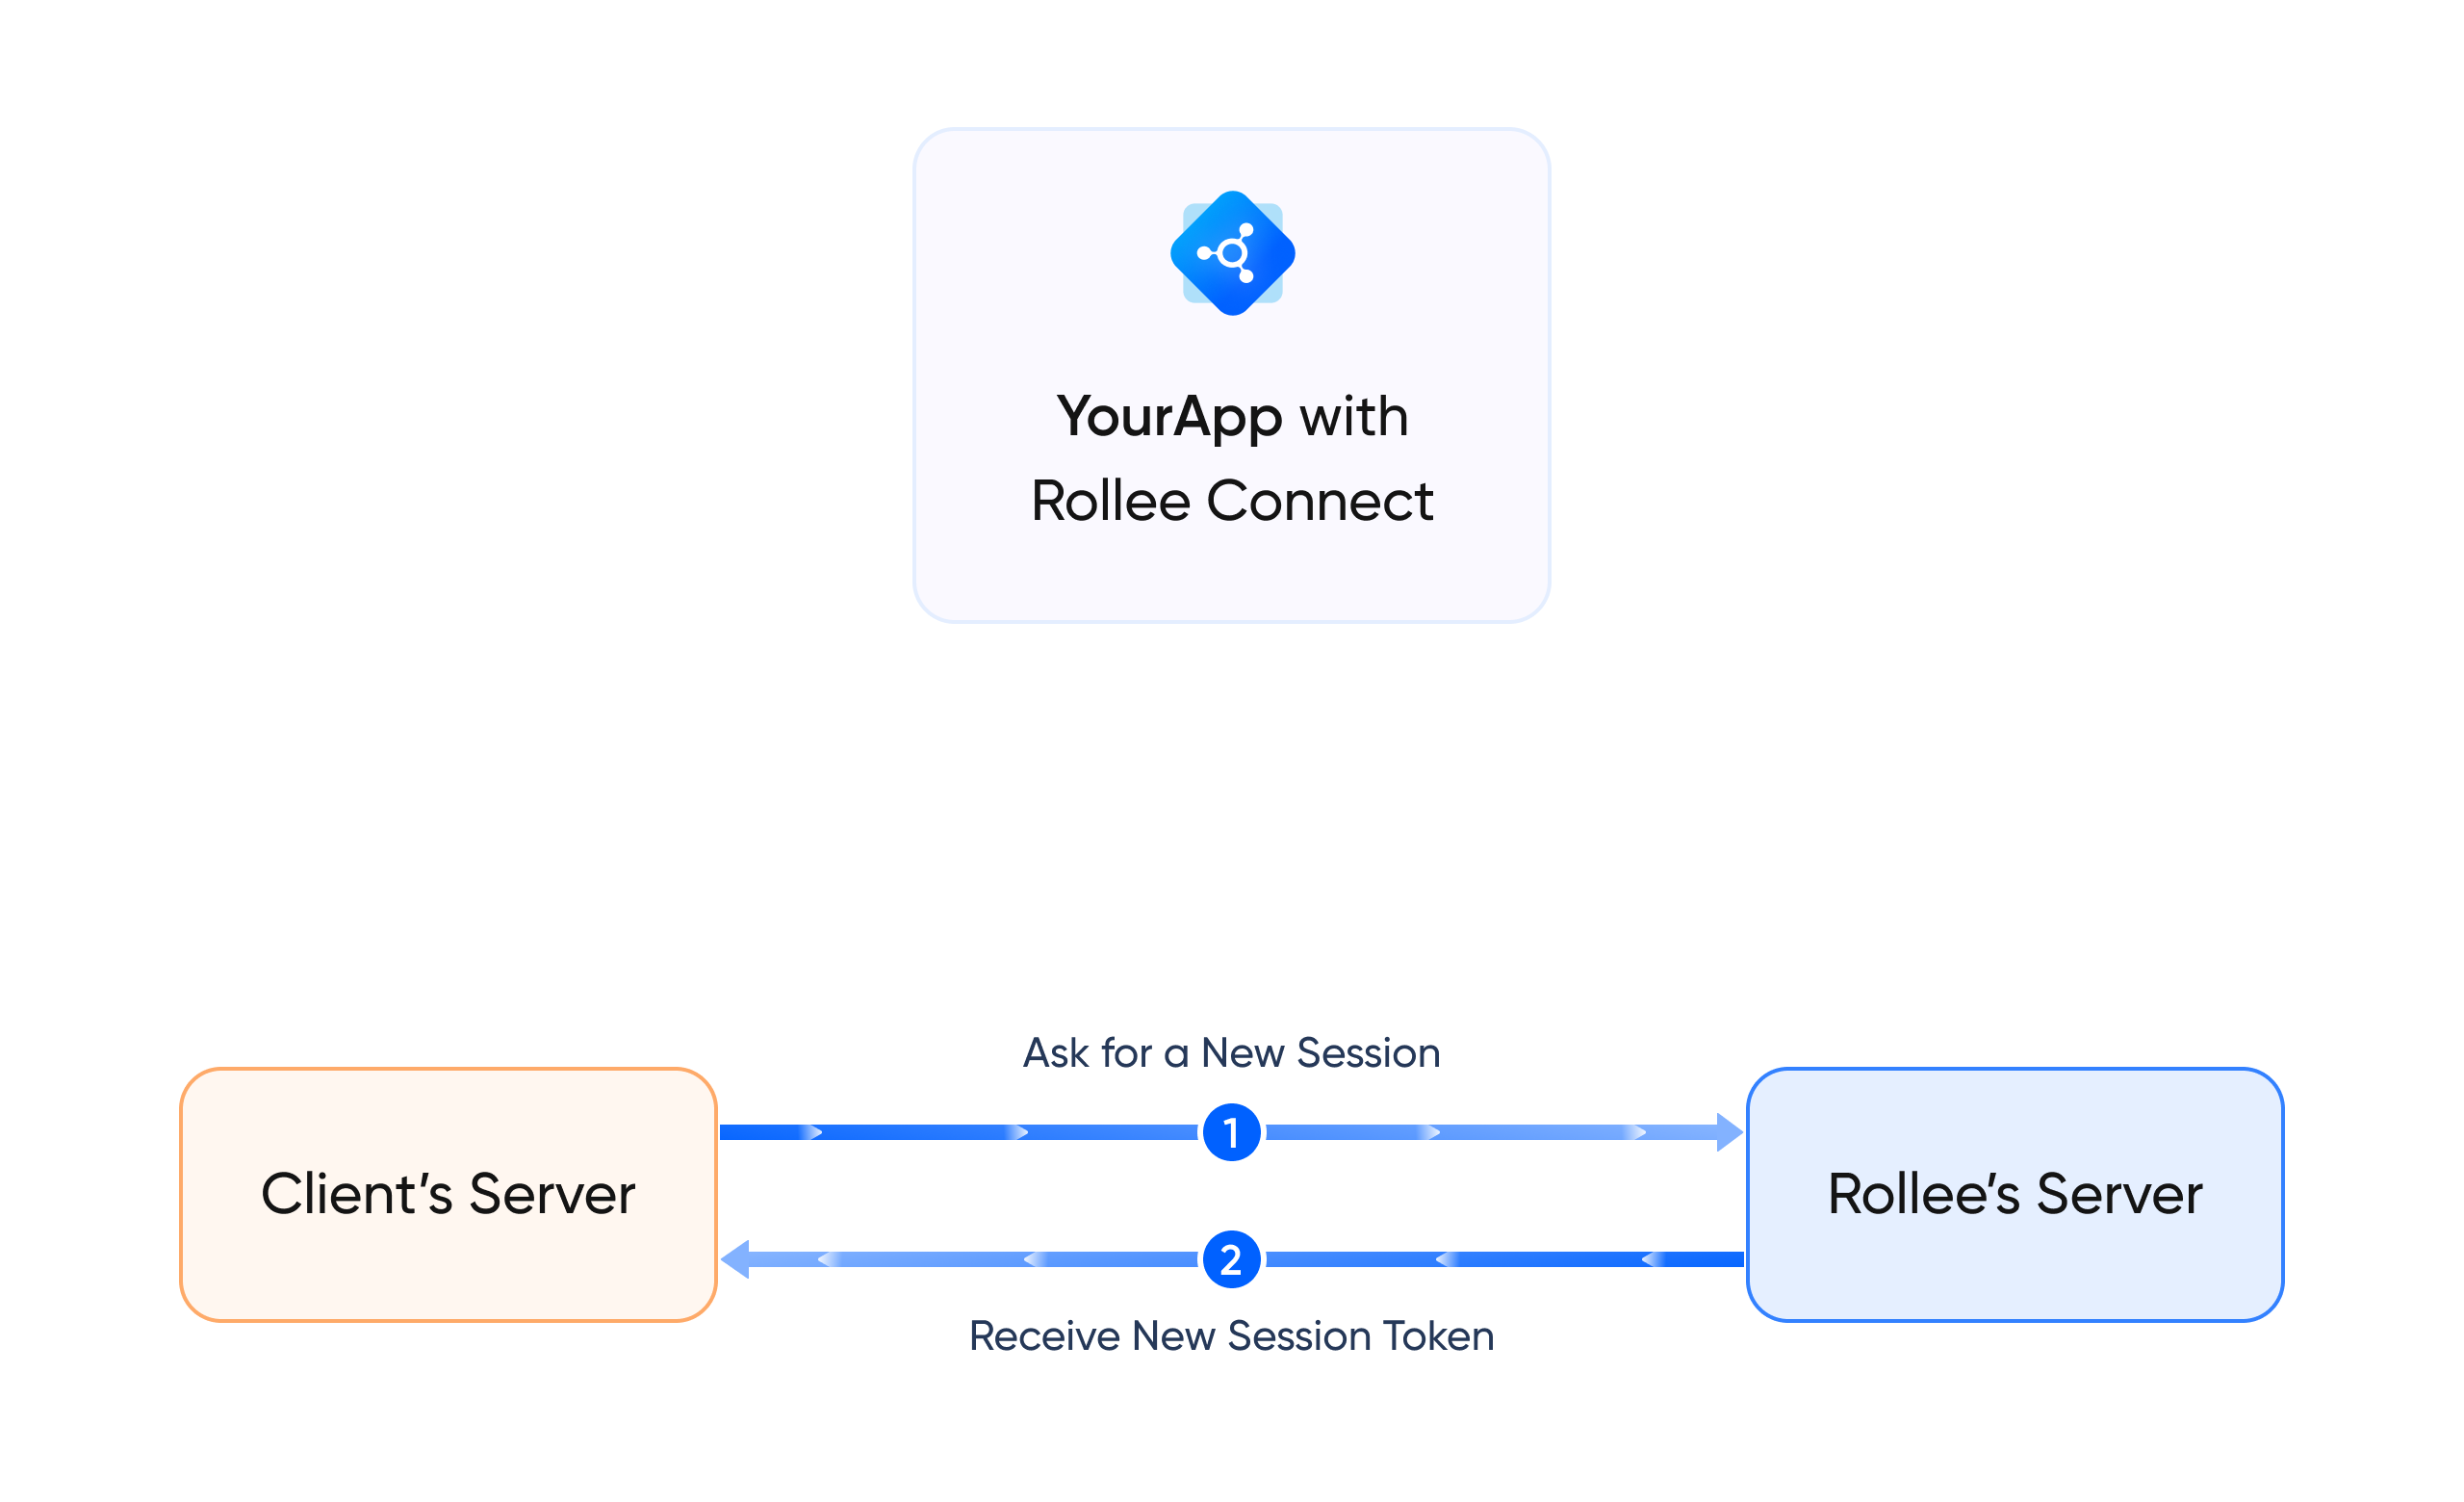
This New Session Token is a token that is valid for only 30 minutes and is meant to serve as a way for our Client’s App to connect directly with Rollee’s Server and connect accounts in a secure way. It is important to mention that this Token is very important, therefore it must be kept safe.
To request a new Session Token, you can do it with the following request by passing your JWT token and one of your User's ID:
curl -X POST -H 'Authorization: Bearer <YOUR_TOKEN>' https://api.getrollee.com/api/v0.4/users/<YOUR_USER_ID>/sessions/new
curl -X POST -H 'Authorization: Bearer <YOUR_TOKEN>' https://api.sand.getrollee.com/api/v0.4/users/<YOUR_USER_ID>/sessions/new
When you create a Session, you receive the ID of the Session in the response. That is the only time you have access to that ID. However, you can create as many Sessions as you wish.
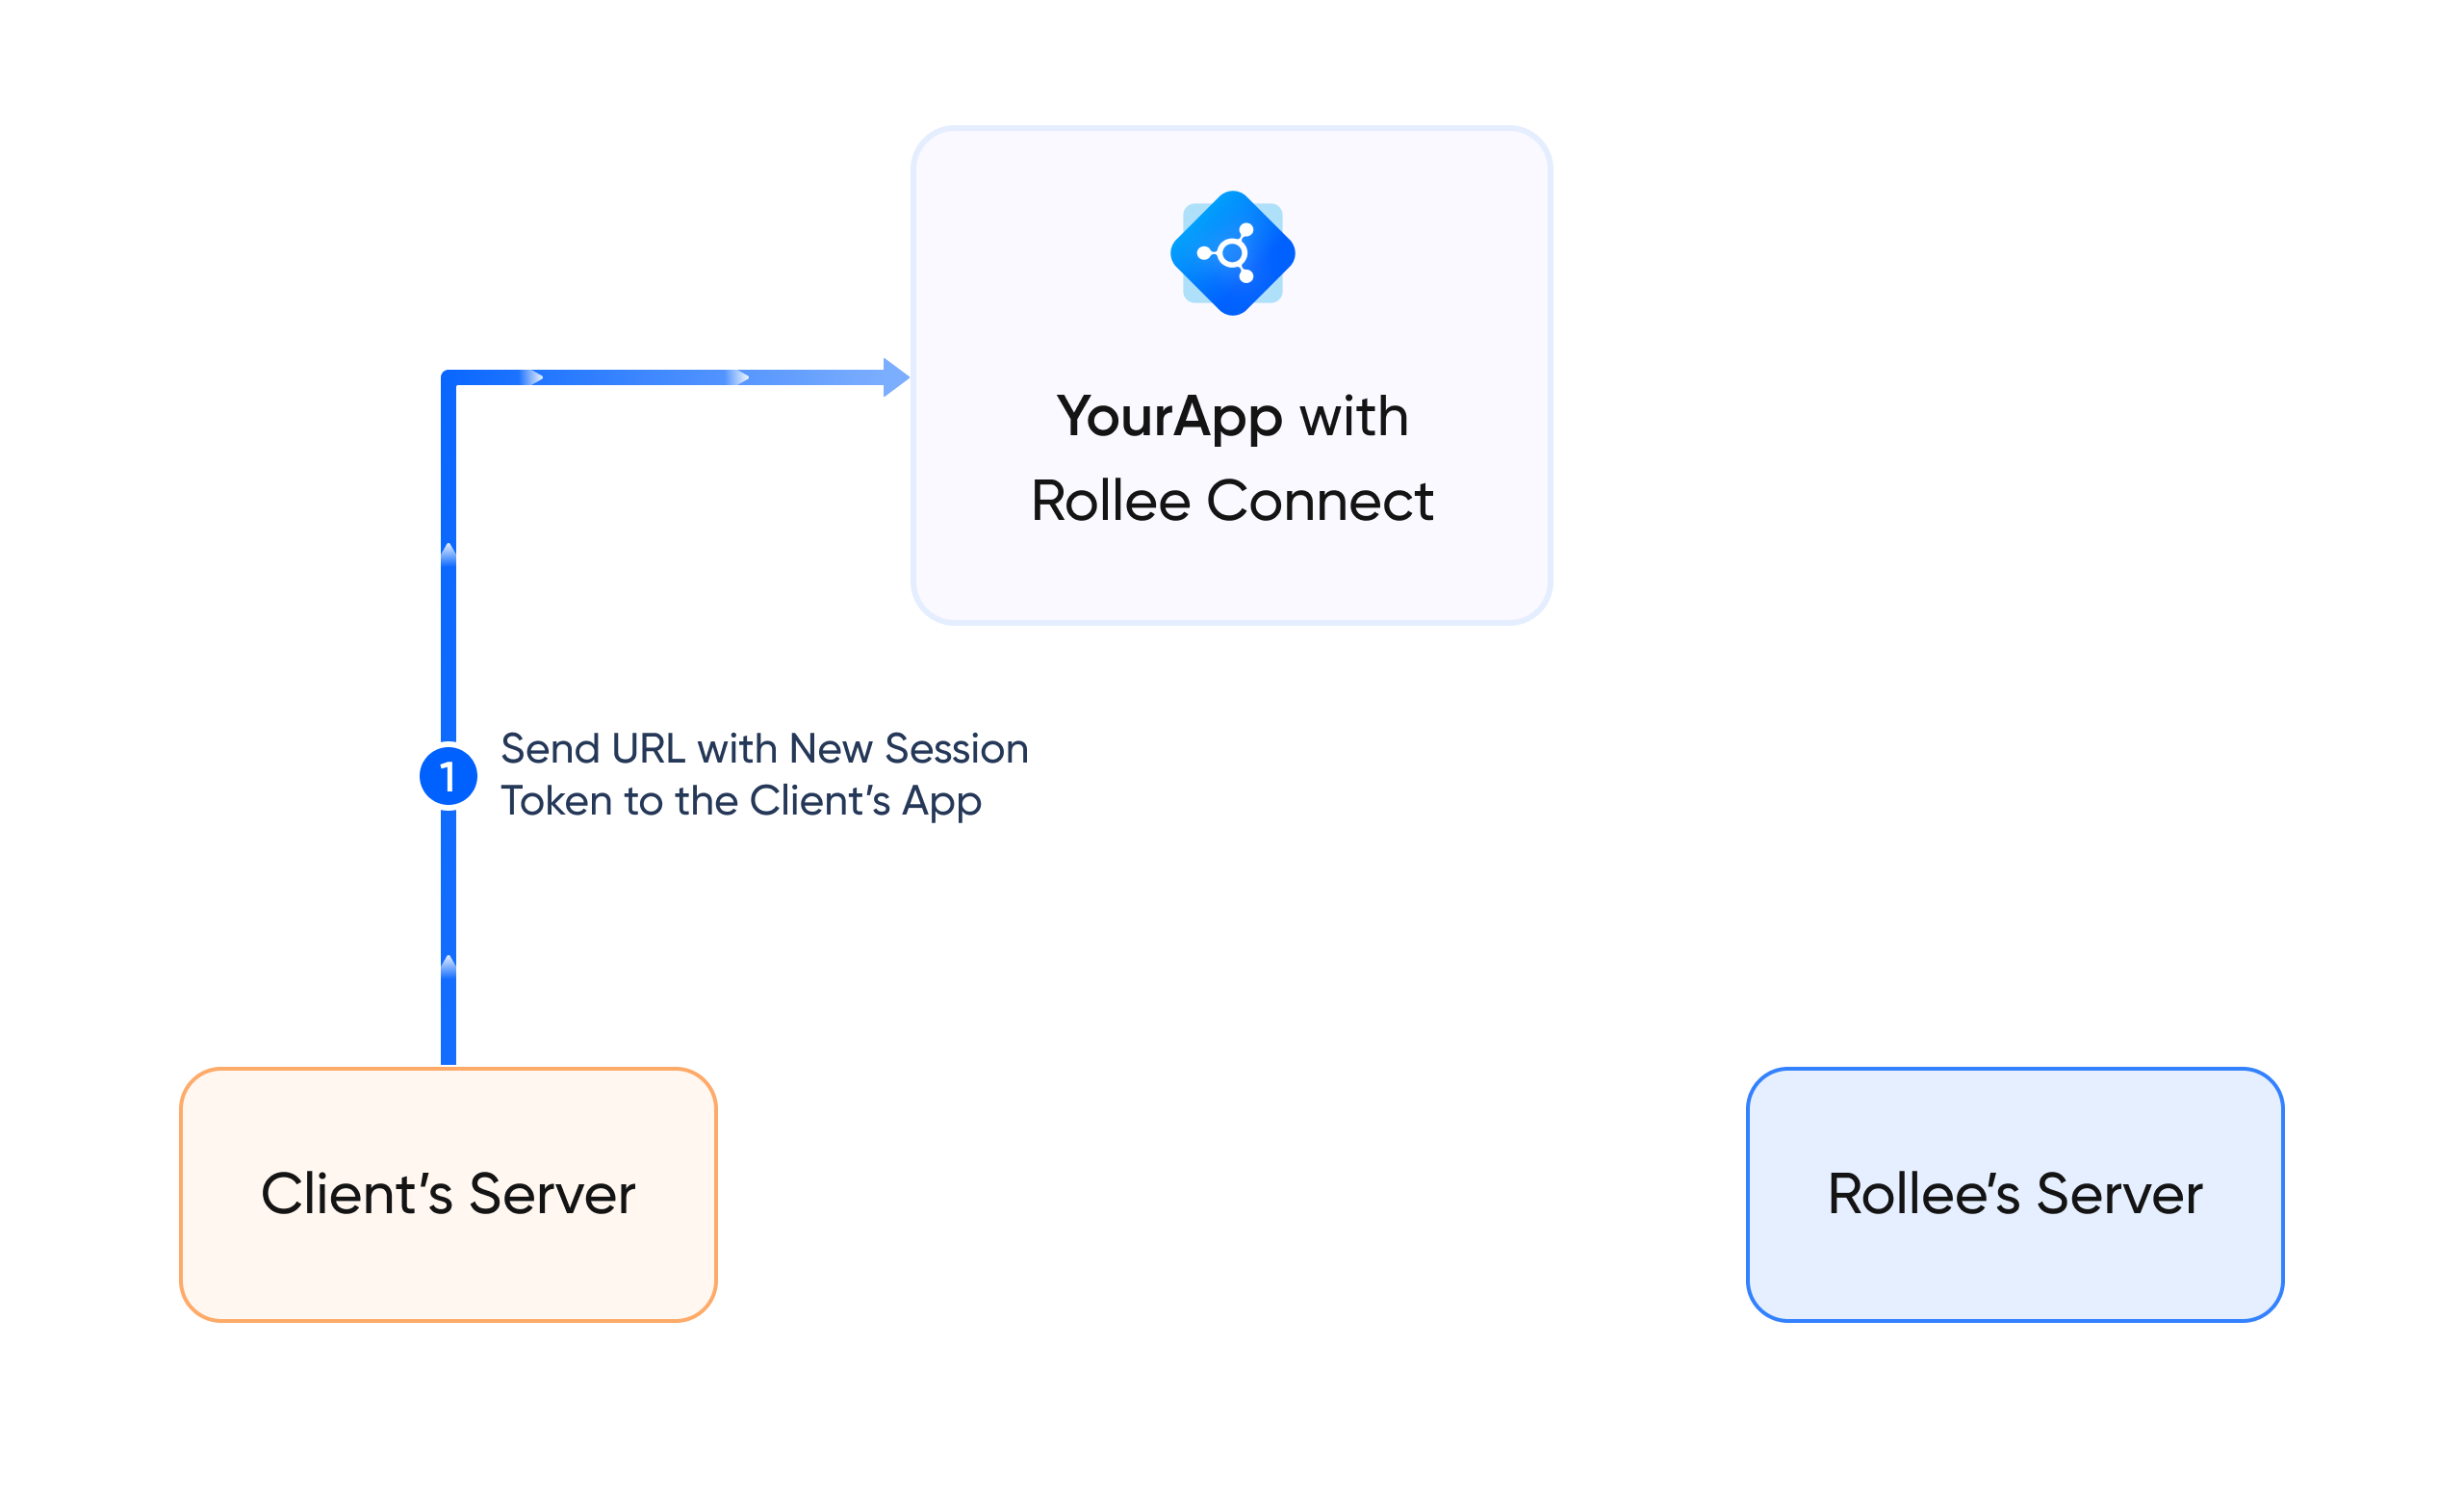
Step 2 - Send the Rollee Connect URL with the New Session Token to the Client’s App
Now, the Client’s App must receive that URL in order to start Rollee Connect with a new session.
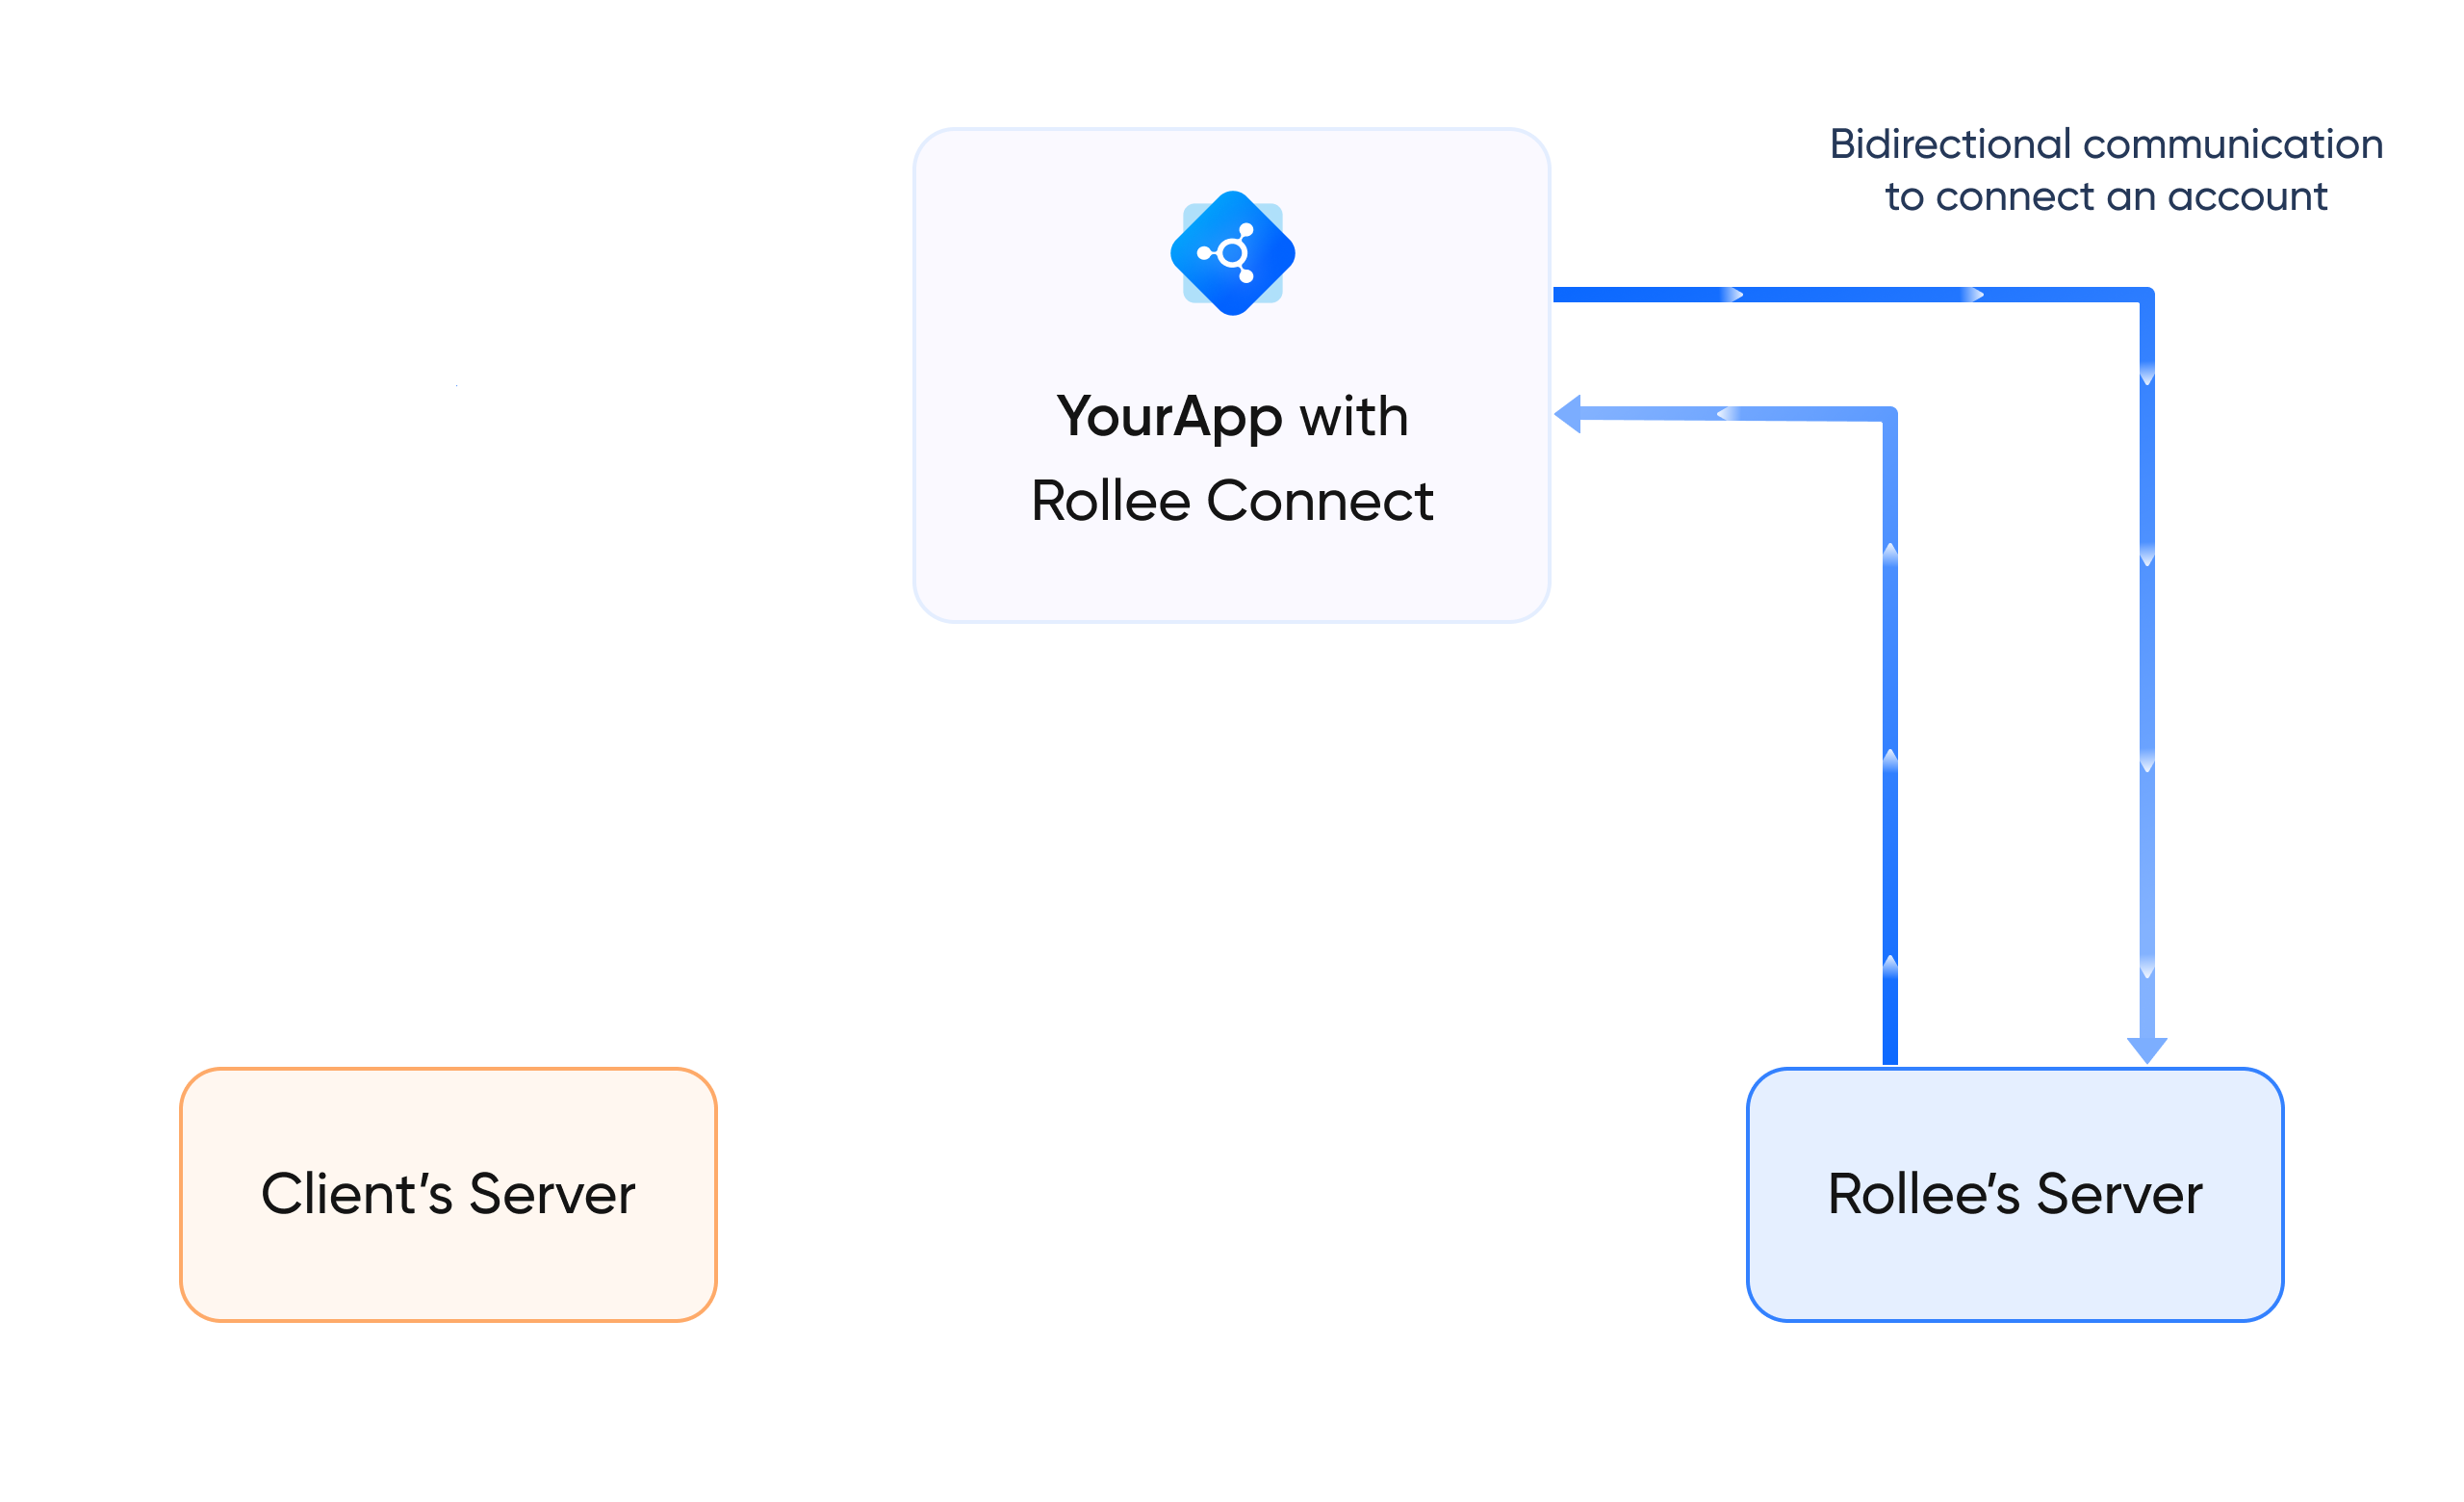
Step 3 - Have the Client’s App communicate directly with Rollee’s Server
At this moment, the Client’s App uses the URL with the New Session Token to start Rollee Connect, which will communicate with Rollee’s Server directly. At this moment, no more interaction with the Client’s Server is needed, and the communications will be accepted at Rollee’s Server for a 30 minutes period.
At this stage you have the entire flow implemented.
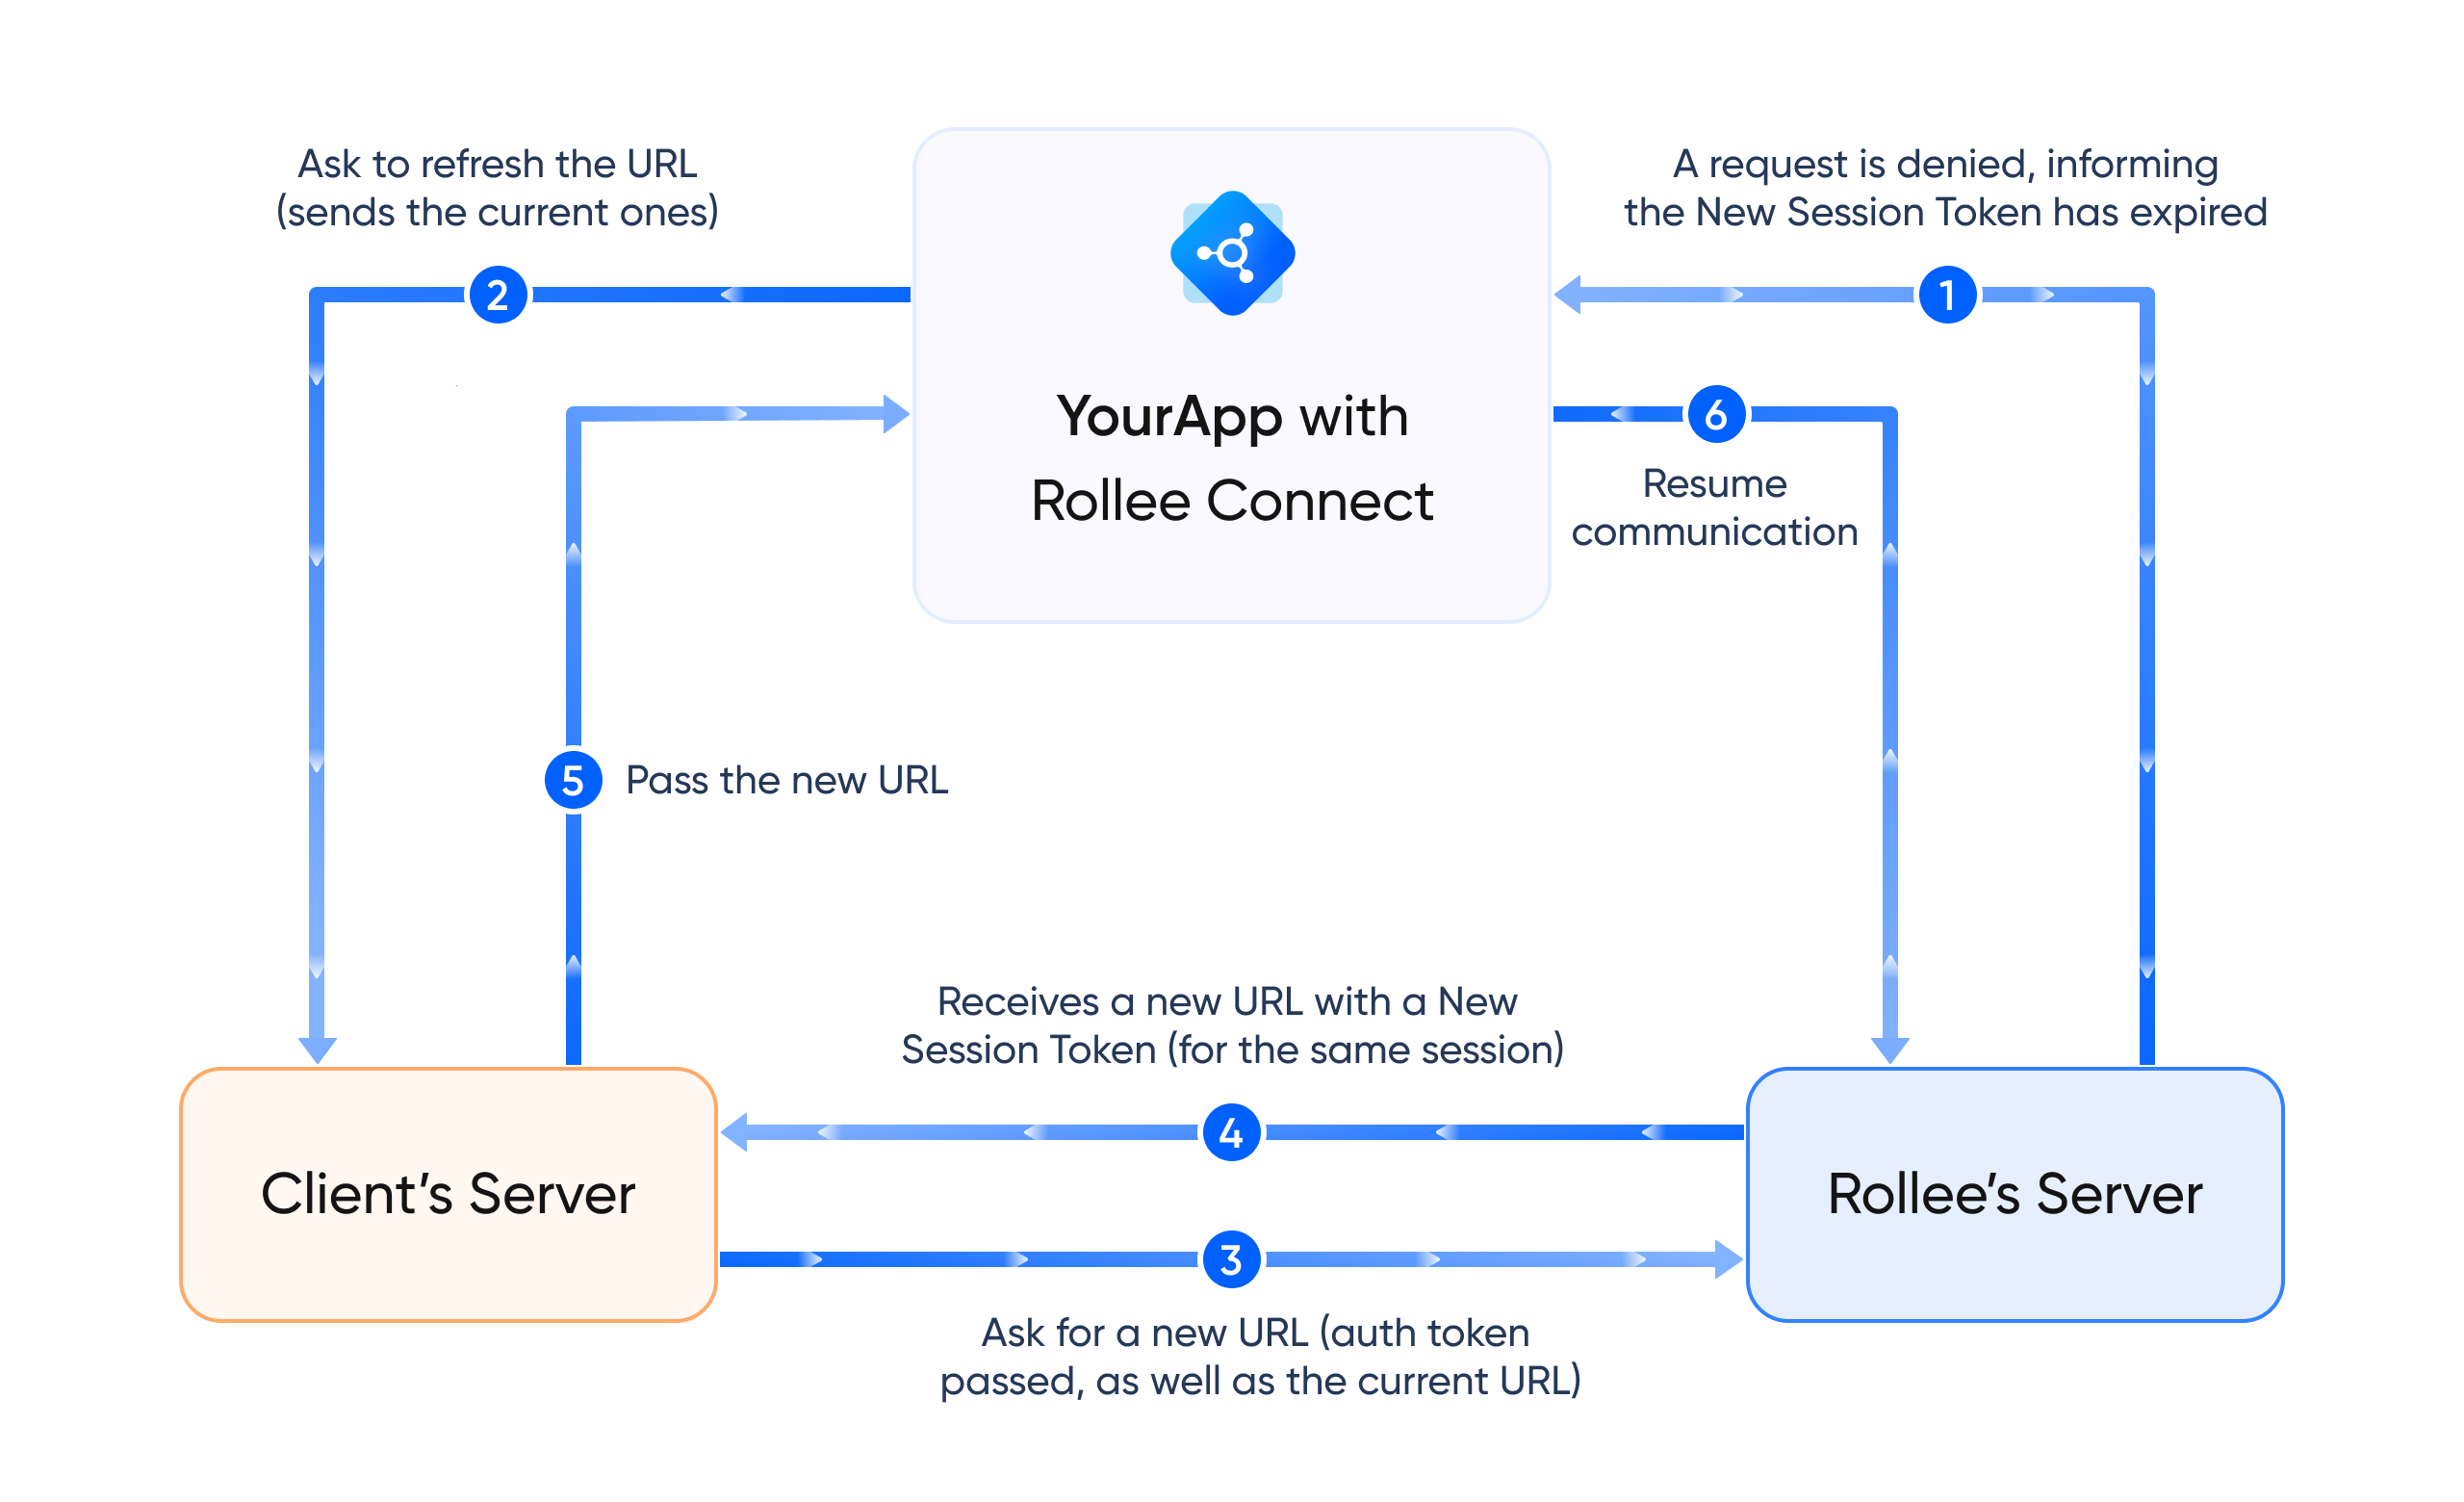
Step 4 (Optional) - Refresh the URL with the New Session Token
After 30 minutes, the URL provided is no longer valid for security reasons. However, if you wish to extend the time, you can request a new URL for the same session that will be valid for another 30 minutes.
Rollee’s Server has an endpoint to refresh the URL with the New Session Token (secured, it needs the initial Auth Token), and it needs to receive the current URL in order to know which New Session we are working with.
The following image illustrates the flow of this task:
Updated 5 months ago